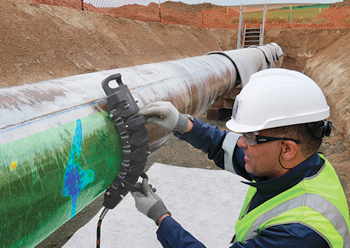
 Spyne is an adaptable surface eddy current array screening tool for hard spot detection.
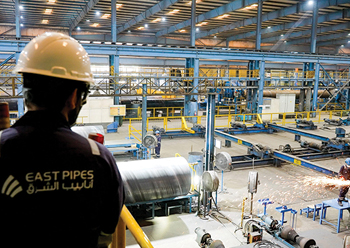
With such a strong emphasis put on the integrity of in-service pipelines, we rarely discuss the non-destructive testing (NDT) required for brand-new steel pipes and plates coming out of the mill. Manufacturing defects are inevitable and often invisible to the naked eye. It is important to implement an effective inspection process as these defects can reduce the longevity of the pipe and present major risks to the ecology and human life should a failure occur. Even worse, those defects can remain dormant for a half-century before starting to cause real trouble.
Welcome to the world of hard spots. In carbon steels, a hard spot is the result of non-uniform and localised quenching during manufacturing. Hard spots have a grain phase and microstructure called martensite which is harder than the bainite and ferrite normally present in the steel. While a harder microstructure means a higher tensile strength, it also means a decrease in ductility and an increase in brittleness. With the tendency of carbon steel pipelines to develop stress corrosion cracking (SCC) when operating in a susceptible environment, their integrity in the presence of a brittle area is being put to the test. Cracks developing inside a hard spot represent a major threat for pipeline operators around the world.
So, how could steel manufacturers in the 1950s make sure that their produced pipes did not include some of those metallurgical anomalies? The short answer is, they could not. This resulted in major hard spots left undetected and still present to this day in buried pipelines.
Fortunately, with today’s technologies, a first screening with in-line inspection (ILI) tools employing magnetic flux leakage (MFL) can identify areas with greater metallurgical hardness along the pipeline. Once found, direct assessment by way of integrity digs accommodates further investigation to assess more accurately the hard spots.
 |
|
a) Without surface preparation, hard spots are invisible to the naked eye; b) Hard spot seen after polishing and nital etching. c), d, and e) show Spyne’s indication of a hard spot, a crack colony and a crack in a hard spot, respectively. |
Traditionally, nital etching has been and is still used to detect surface variations related to hard spots. This method highlights softer tempered areas by burning and therefore darkening them faster than harder regions. In order to be effective, nital etching requires intensive surface preparation – to the point of almost requiring a fully polished pipe.
Once found, the hardness can be measured more precisely with different hardness test methods such as Brinell and Rockwell (indentation) and the Leeb Rebound Hardness Test (non-destructive). Given the long process of surface preparation, nital etching and hardness measurement, technicians will focus solely on the regions with indications from the ILI tool. This selective follow-up puts the pipeline at risk of being reburied with missed hard spots located only inches away from the inspected area.
Canada-headquartered Eddyfi Technologies’ Spyne, an adaptable surface eddy current array (ECA) screening tool provides a solution for better and faster hard spot detection. Because of its very high sensitivity to magnetic permeability and conductivity changes in alloys, the eddy current technique has been widely used in the industry for material sorting. Coincidentally, this also makes ECA the tool of choice for hard spot detection because of the significant microstructure changes that occur during the localised hardening of the steel which will strongly affect its local properties.
Independently of the carbon steel alloy, with its 200 mm of coverage and scanning speed up to 600 mm per second, the Spyne will easily detect the hard spots reported by ILI tools, and probably more in the same area, so that no hard spot is left undetected. No additional surface preparation other than sandblasting is required to scan a pipe with the Spyne.
More importantly, this technology has been widely used for the rapid detection of SCC. As shown in the figure above, while hard spots are associated with a bright blue indication in the eddy current C-scan colour map, the crack indications are redisplayed in orange. Overall, in a matter of minutes, Spyne can deliver a complete 360-degree map of a pipe joint, showing all hard spot and crack indications at once – a significant improvement of detectability and efficiency over nital etching and visual inspection.
But let’s return to the initial question: can we tackle the threat of hard spots at its source by employing the Spyne directly in steel mills? Thanks to the high customisability of the tool, the answer is yes. Whether it needs to detect hardness in large pipes, plates, or beams, the Spyne can be attached to a wide array of scanners, poles, bogeys, or even to a remote-controlled crawler that will facilitate the inspection of large surfaces immediately after being manufactured, while preserving good ergonomics for the operators.
For instance, a simple pole that can be attached directly on the Spyne, to facilitate manual scanning of large plates. Multiple Spyne probes can also be used in parallel to create an even wider array of sensors and accelerate the inspection of large surfaces. In that sense, the Spyne technology could represent a game-changer not only for in-ditch pipeline integrity programmes, but also within the industrial processes where the hard spots originate.
Eddyfi Technologies offers a comprehensive range of inspection solutions to address industry needs. The Panther is another directly applicable corrosion mapping solution for similar applications. It offers super high-resolution total focusing method (TFM) imaging with 1.5+ million pixels in real-time.




.jpg)






















.jpg)


.jpg)


